What Happens if You Make a Negative Picture Negative Again
In the analog days of photography, one would take a roll of film and hold it up to the safelight of the darkroom to see what was there before deciding which images to develop. On the film's surface, the content of the photos appeared "negative," meaning that the tonalities were inverted. In the case of black-and-white film, this meant that dark tones seemed light and vice versa. In other words, it was like seeing an image in reverse.
These ghostly miniature images of the film rolls of old became so popular they morphed into their own style. Even though not many of us currently use film, we still create this effect. It's common in suspense and horror films, but it's in no way limited to these genres either. Negatives give off a nostalgic vibe, and applying this inverted effect to digital photos is an easy way to add some artfulness to a composition
In fact, you can now apply this effect in creative, layered ways and take an ordinary image to new levels. Instead of transforming an entire image into a negative, you can invert certain sections and shapes within a photo, achieving a funky abstract look in a matter of seconds. In the angolgue age, this kind of editing would have taken several sessions in the darkroom and involved a lot of cutting and pasting. Now, you can quickly make virtual cuts and easily flip negative and positive gradients. In the following tutorial, we'll explore how to invert an image in this way.

New-Age Negatives: Digital Magic
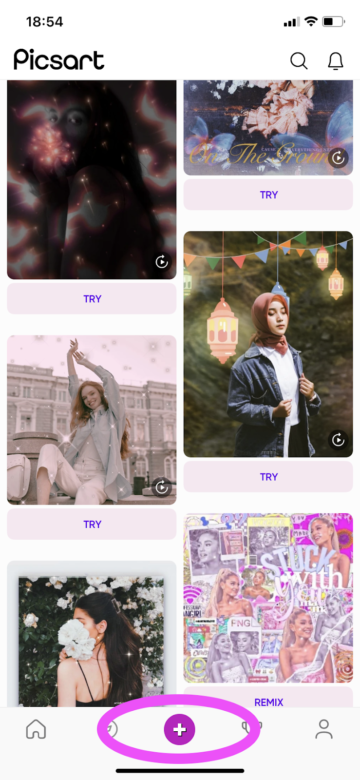
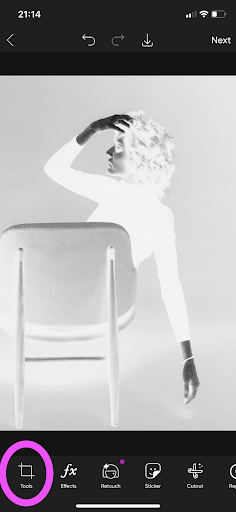
- Open the Picsart mobile application and click on the purple plus sign at the bottom of the screen to start a new project. Your photo library will appear at the top of the screen. Select the photo with which you wish to work. We recommend choosing a black-and-white portrait, if possible, for your first attempt at using this effect. With a two-tone image, it's easy to differentiate flipped shades. You can invert color images, too, so if you don't have a grayscale photo on hand, that's not a problem. You'll get eye-catching results with whichever image you choose.
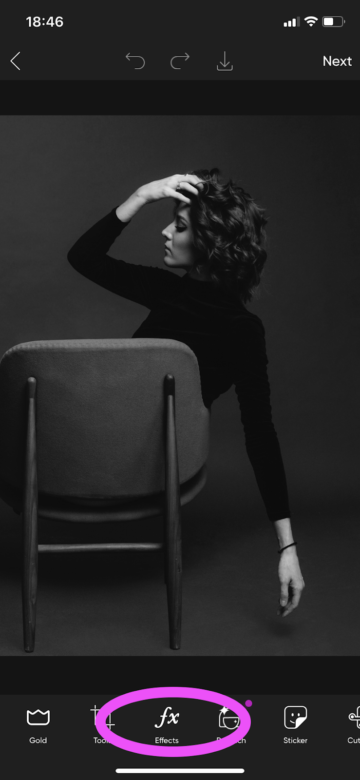
2. On the editing screen, select the "FX" tool from the menu beneath your canvas. This is one of only two tools you'll need to pull off an incredible look.
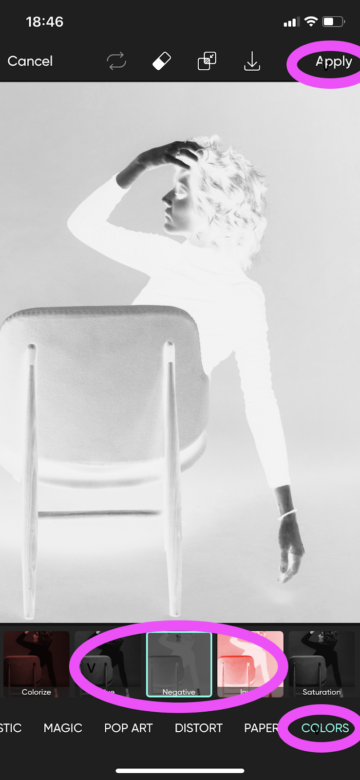
3. With the "FX" tool open, you'll see various filter categories . We have a vast library of filters, so choose the "Colors" category to narrow your options, and then select "Negative." This will invert the tonalities of your entire photo. Once you've applied the filter, select "Apply" in the upper right-hand corner of the screen to make the effect stick.
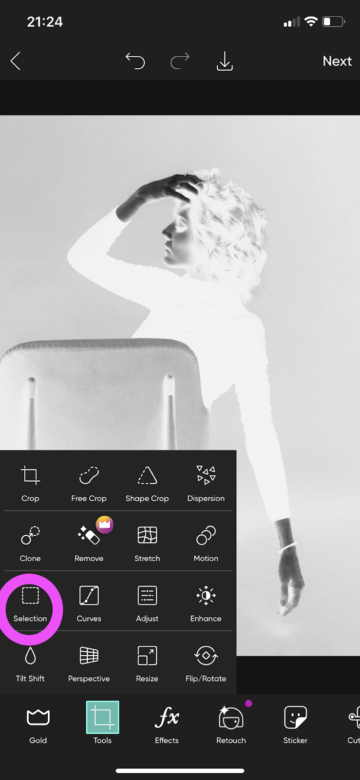
4. If you're satisfied with your project, jump to the final steps of this tutorial to learn how to export and share your image. However, we recommend having some more fun with this effect by applying it to sections of your photo to add complexity to your composition. To select a particular area, use the "Selection" function, which can be found under "Tools" in the menu at the bottom of the screen.
5. With the "Tools" pop-up menu open, choose "Selection." This tool will allow you to grab and edit a specific part of your photo without making wholesale changes to the rest of the image.
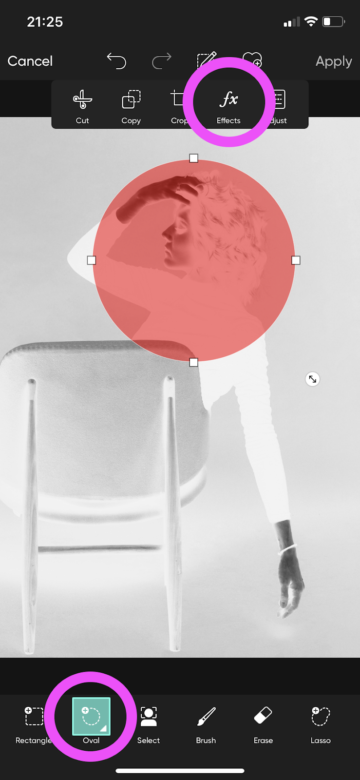
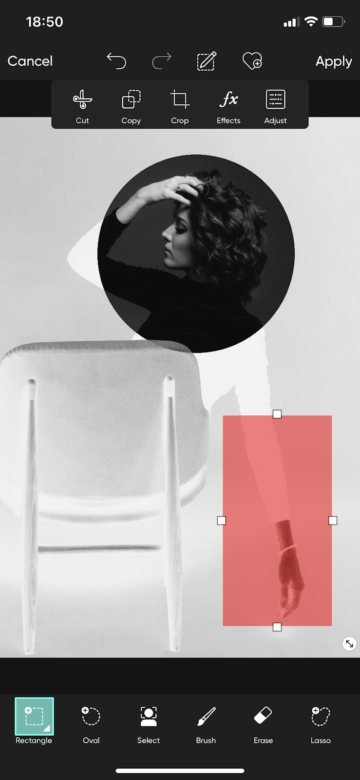
6. Choose a selection shape from the menu at the bottom of the screen, and move and stretch it until it's covering the part of the photo to which you wish to apply the next "Negative" filter. We recommend starting with the "Rectangle" and "Oval" options, but if you're feeling adventurous, you could also try drawing your own shape with the "Brush" tool. Once you've situated your shape, click "FX" in the toolbar pop-up at the top of the screen. The app will apply the edits you make during this step only to the selected area.
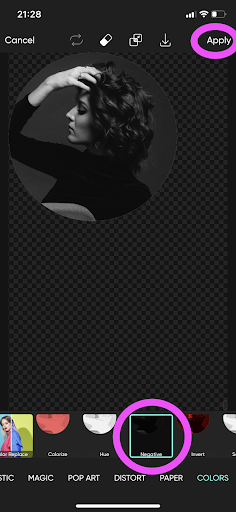
 7. On the next screen, select "Negative" from the menu of effects at the bottom of the page. Don't worry about the fact that the rest of your image has momentarily disappeared. Remember, you're only editing the selected area at this time. Once you've placed the filter, click "Apply" in the upper right-hand corner to get back to your entire image.
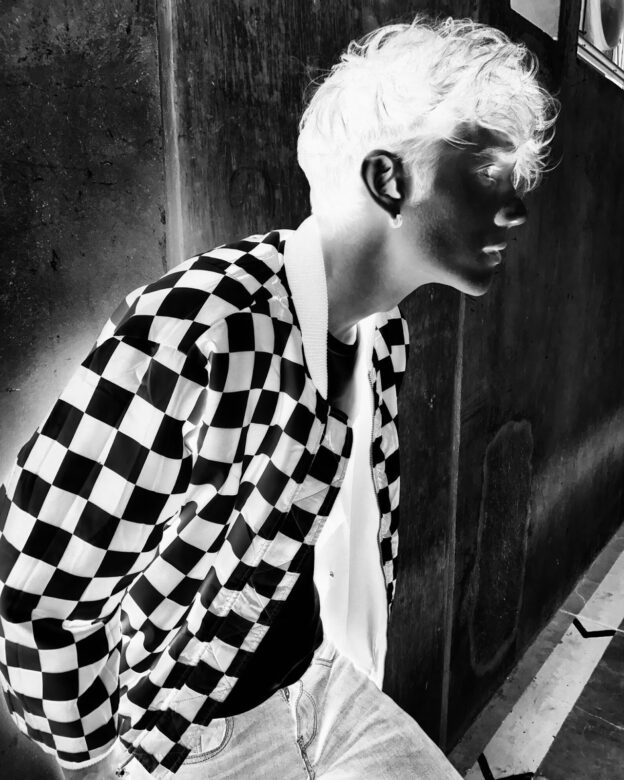
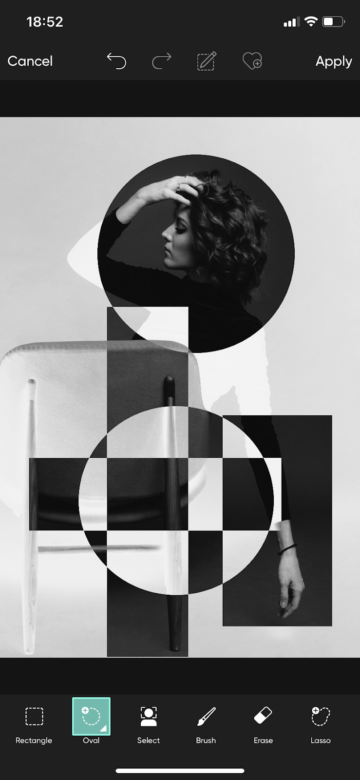
8. Now it's time to unleash your creativity. Repeating steps 6 and 7, make more selections in different shapes and invert the hues of only these parts. If you don't know where to start, try selecting focal points in your composition, as we've done below. We've focused on the face and hands of the portrait, but this tip applies to any image. If you're working with a landscape, for example, you can select a prominent feature of the image, like a building or monument.
9. Play with double-negatives by layering selections. If you select part of the photo already cast in negative hues, the "Negative" filter will nullify the effect. If you select part of the photo that crosses both negative and positive hues, the selection will flip both, making the positive tonalities negative and vice versa. The more selections you make, the more complex and abstracted the resulting image will look. Our recommendation is not to overthink this step. Play around and see what looks good. You can always hit the undo arrow if you aren't convinced.
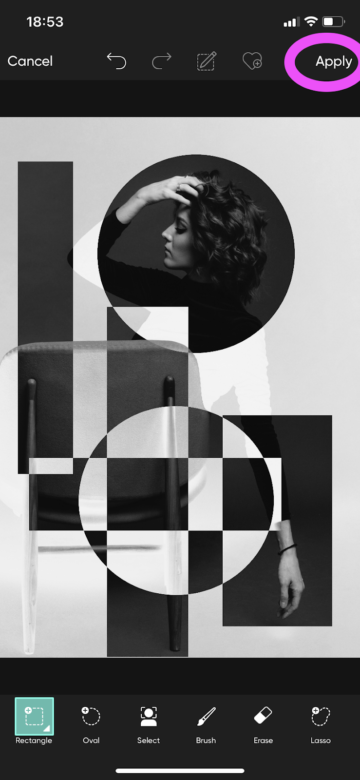
10. When you're satisfied with your composition, click "Apply" in the upper right-hand corner of the screen to save your changes.
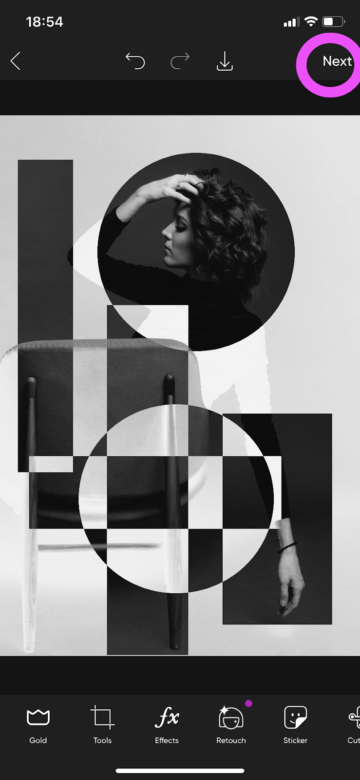
11. If you're done editing your image entirely, click "Next" in the upper right-hand corner of the screen. Otherwise, stick around on the editing page to add final touches like text or stickers.
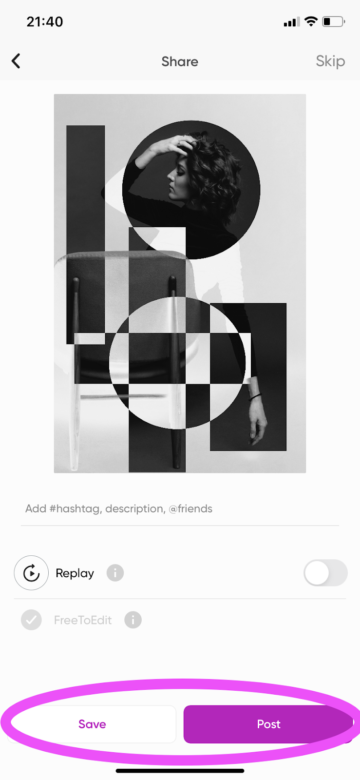
12. On the final screen, you can choose whether to save your photo or post it to social media. If you're proud of your design — and you should be — share it widely and inspire others. You can post to Instagram, Pinterest , and beyond directly from the Picsart app. Don't forget to add a hashtag like #negative or #film to help followers understand how you created this look.
Create at the Speed of Culture
Picsart is a full ecosystem of free-to-use content, powerful tools, and creator inspiration. With a billion downloads and more than 150 million monthly active creators, Picsart isn't just the world's largest creative platform; we're also the fastest growing. Picsart has collaborated with major artists and brands like BLACKPINK, the Jonas Brothers, Lizzo, Sanrio: Hello Kitty, I am a Voter, Bebe Rexha, Maroon 5, One Direction, Warner Bros. Entertainment, iHeartMedia, Condé Nast, and more. Download the app or start editing on web today to enhance your photos and videos with thousands of quick and easy editing tools, trendy filters, fun stickers, and brilliant backgrounds. Unleash your creativity and upgrade to Gold for premium perks!
richardsonivizeely.blogspot.com
Source: https://picsart.com/blog/post/how-to-apply-negative-effect-with-picsart
0 Response to "What Happens if You Make a Negative Picture Negative Again"
Post a Comment